
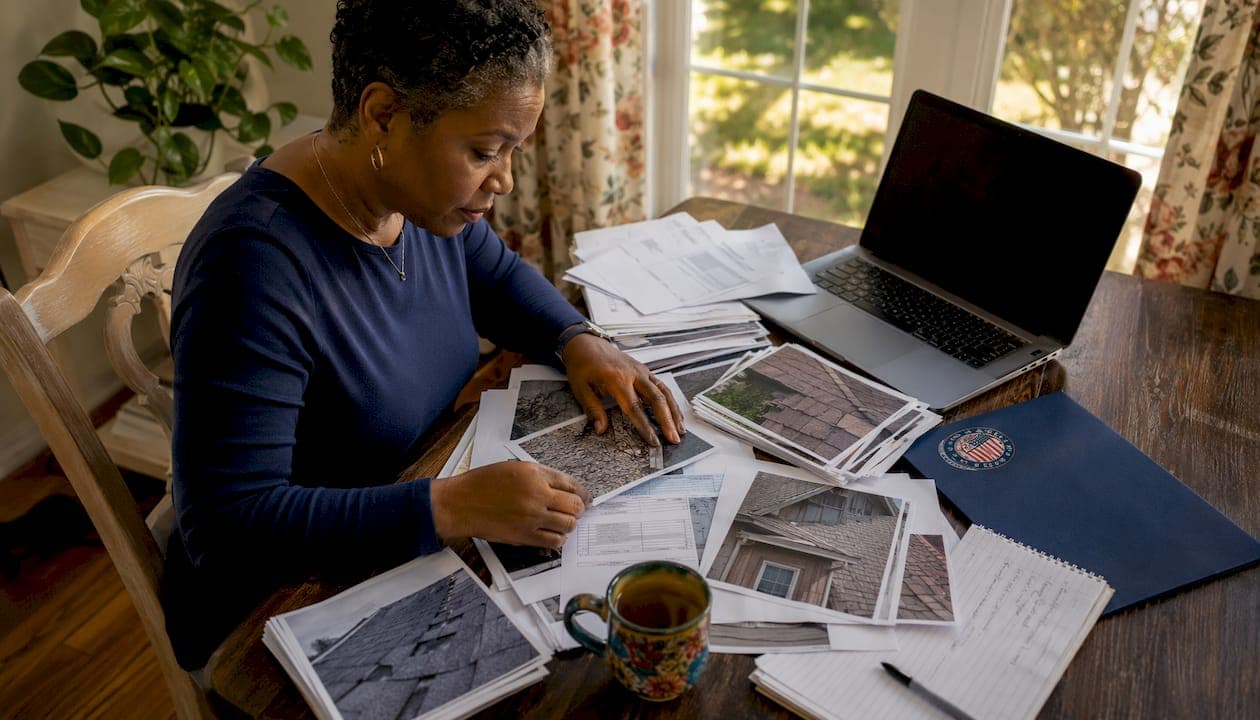
Filing a roof insurance claim the right way comes down to eight steps: document the damage, review your policy, get a professional contractor inspection, open the claim and get a claim number, make emergency temporary repairs, meet the adjuster with your contractor present, review the settlement and file supplements for missed items, then complete repairs and collect final payment. The two actions that matter most in the first 24–72 hours are documenting everything with photos and timestamps, and getting a written contractor estimate before the adjuster arrives. Every other step builds on those two.
- Document all damage with photos, video, and timestamps
- Review your policy for deductible type, ACV vs. RCV, and filing deadlines
- Hire a local contractor to inspect and provide a written, Xactimate-compatible estimate
- Call your insurer, open the claim, and record your claim number
- Make emergency temporary repairs (tarping) and save every receipt
- Meet the adjuster with your contractor present
- Review the insurer's scope line by line and file supplements for missed items
- Complete repairs and collect the recoverable depreciation (final payment)
Pro Tip: Treat this claim like a legal case file from day one. Log every phone call with the date, time, the representative's name, and a summary of what was said. Keep all receipts, photos, and written communications in one folder, cloud-backed and shared with your contractor. That documented claim file is your strongest tool if the insurer underpays or denies.
Table of Contents
- Does homeowners insurance cover roof damage?
- How to document roof damage like an evidence file
- Step-by-step: how to file your roof insurance claim
- Emergency repairs, tarping, and working with contractors
- How to prepare for the insurance adjuster visit
- Typical roof claim timeline and common mistakes to avoid
- What to do if your claim is denied or underpaid
- Printable documentation checklist and sample claim log
- How a local contractor helps you through the claim process
- Key Takeaways
- What most homeowners get wrong about roof claims
- The Original Roof Repair Company handles the hard parts of your claim
- Useful sources and Georgia state resources
- FAQ
Does homeowners insurance cover roof damage?
Most standard homeowners policies cover sudden, accidental damage from named storm perils: wind, hail, lightning, and fire. What they do not cover is gradual deterioration, age-related wear, or maintenance neglect. If your roof fails because of age and lack of maintenance, that is a maintenance issue, not a covered peril. The distinction matters because adjusters are trained to look for pre-existing wear, and they will note it in their report.
The bigger financial question is whether your policy pays Actual Cash Value (ACV) or Replacement Cost Value (RCV). ACV subtracts depreciation from the payout, so an older roof might be worth significantly less than replacement cost on paper. RCV pays the full cost to replace with like materials, releasing the depreciated portion after work is complete. For Georgia homeowners with older roofs, the difference between ACV and RCV can be substantial.
| Feature | ACV Policy | RCV Policy |
|---|---|---|
| Initial payout | Depreciated value of roof | Full replacement cost minus deductible |
| Depreciation holdback | Permanent (you absorb it) | Released after repairs are complete |
| Best for | Newer roofs with low depreciation | Older roofs where depreciation is significant |
| Out-of-pocket risk | Higher on aging roofs | Lower, assuming work is completed |
| Common in Georgia | Yes, especially on older homes | Yes, standard on most newer policies |
Georgia policies also vary on deductible structure. A flat-dollar deductible is straightforward. A percentage deductible for wind or hail, typically a small percentage of your dwelling coverage limit, can be significantly higher. Check your declarations page for the specific deductible amounts and types applicable to your policy. Check your declarations page for the Loss Settlement clause, your deductible type, your dwelling coverage limit, and any policy filing deadline. Many policies require you to file within a specific window after the damage event, sometimes as short as one year.
To understand whether your situation calls for a warranty claim or an insurance claim, the distinction between warranty vs. insurance coverage for Georgia homeowners is worth reviewing before you call your insurer.
How to document roof damage like an evidence file
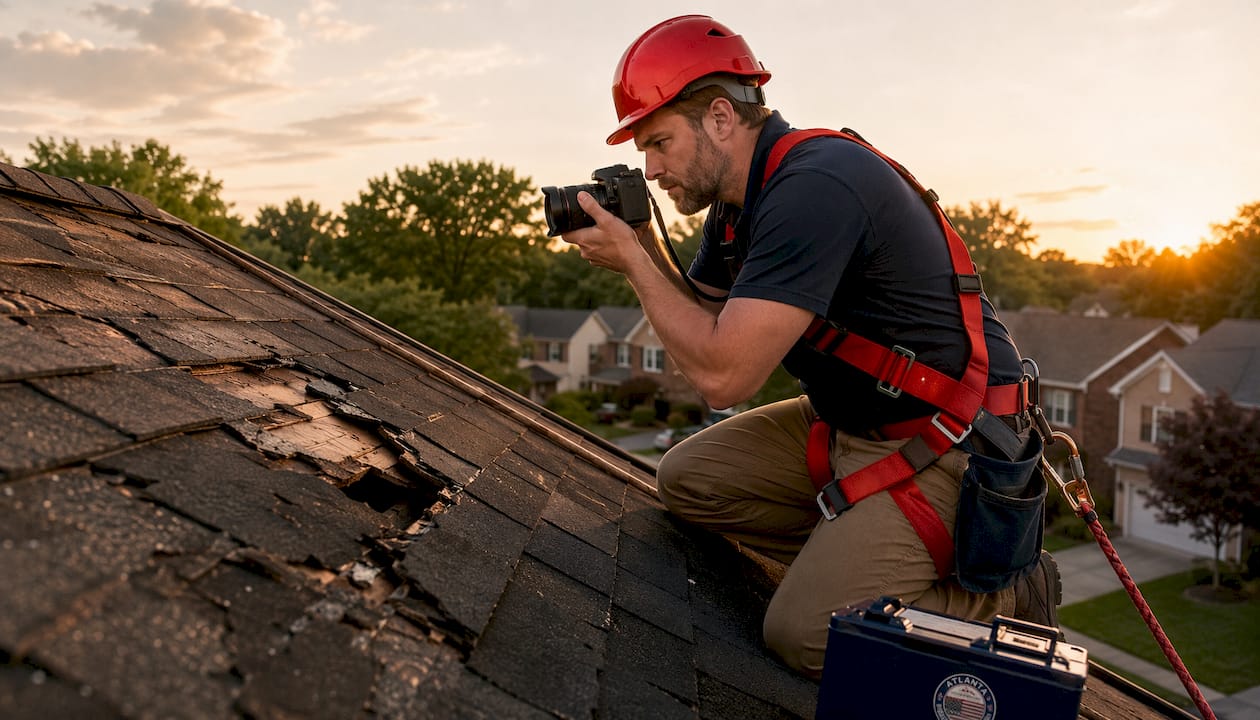
Professional documentation is what separates a paid claim from a disputed one. Start from the ground: photograph the full roofline from all four corners, then move to close-ups of every damaged shingle, missing tab, dented flashing, and cracked vent boot. Inside the home, photograph any water stains on ceilings or walls, and note the room location in the filename. Shoot a continuous walkthrough video with narration describing what you see and where you are standing. Every photo and video file should carry an automatic date/time stamp from your phone's camera settings.
Do not climb the roof yourself. Professional inspections produce admissible evidence and technical notes that carry weight with adjusters; homeowner photos taken from a damaged roof can be discounted on safety grounds. A licensed contractor can access the roof safely, photograph granule loss, hail strikes, and lifted decking that a ground-level camera cannot capture, and produce a written report that matches the format adjusters use.
Weather evidence is equally important. Pull a storm report from NOAA's National Weather Service for the date of the event. That report documents wind speed, hail size, and storm track, which directly supports your claim that a covered peril caused the damage. Adjusters and insurers use this data too, and having it in your file before they do puts you ahead.
Pro Tip: Never climb a visibly damaged roof. Hire a contractor for the rooftop inspection and professional photos. A roofer's signed report carries far more weight with an adjuster than homeowner snapshots taken from a ladder.
Sample claim log fields to track from day one
| Field | What to record |
|---|---|
| Date | Calendar date of the contact or action |
| Time | Exact time (include AM/PM) |
| Contact name | Full name and title of person you spoke with |
| Company | Insurer, contractor, or other party |
| Summary | What was discussed, agreed, or requested |
| Attachment | Photo file name, email thread, or document reference |
| Follow-up needed | Yes/No and deadline |

For a detailed breakdown of what a contractor's written report should contain, the roof damage report guide for Georgia homeowners walks through every line item.
Step-by-step: how to file your roof insurance claim
Follow these steps in sequence. Skipping or reordering them is one of the most common reasons claims are delayed or underpaid.
- Call your insurer within the policy's filing window. Have your policy number ready. State the date of the storm event, the type of damage (wind, hail, water intrusion), and that you are opening a claim. Ask for a claim number before you hang up.
- Request an adjuster assignment and timeline. Ask how long before an adjuster will contact you. Stage medians show that adjuster assignment typically takes a few days after filing, with inspection scheduled roughly within the following week.
- Submit your initial documentation package. Email or upload your photos, video, contractor estimate, and NOAA storm report to the claim portal. The more complete your file at this stage, the faster the process moves.
- Schedule the adjuster inspection with your contractor present. Do not meet the adjuster alone. Your contractor can point to damage the adjuster might miss and speak the same technical language.
- Review the insurer's scope of loss line by line. Compare it to your contractor's estimate. Look for missing line items: deck replacement, code-required upgrades, ice and water shield, drip edge, and waste factors are commonly omitted.
- Request the ACV check and understand the holdback. If you have an RCV policy, the first check covers the ACV. The depreciation holdback is released after the work is complete and you submit invoices.
- File a supplement for any missed items. A supplement is a formal request to add line items the adjuster omitted. Independent contractor estimates that are Xactimate-compatible make it straightforward to compare scopes and identify gaps.
- Complete repairs and submit completion documentation. Final invoices and photos of completed work trigger the depreciation release on RCV policies.
What to say and what to avoid
When speaking with the adjuster, state facts: the date of the storm, what you observed, and what your contractor found. Point to your photos and the written estimate. Do not speculate about cause, minimize damage ("it's probably not that bad"), or agree to a settlement on the spot without reviewing the scope. Avoid saying the roof was "old" or "already had some issues" without context, as adjusters will use that to argue pre-existing wear.
When calling your insurer to open the claim, a straightforward script works: "I'm calling to report storm damage to my roof from the [date] event. I'd like to open a claim and get a claim number. My policy number is [X]."
To understand what types of storm damage Georgia policies typically cover, reviewing covered perils before the adjuster arrives helps you frame the conversation accurately.
Emergency repairs, tarping, and working with contractors
Emergency temporary repairs are both allowed and expected by most policies. Tarping a damaged section, boarding a broken skylight, or placing buckets to prevent interior water damage are all reimbursable when documented properly. Photograph the damage before you tarp, photograph the tarp installation, and save every receipt for materials and labor. Do not begin permanent repairs before the adjuster inspects. Replacing shingles or patching decking before the inspection removes evidence the adjuster needs to assess the full scope.
Choosing the right contractor matters as much as the repairs themselves. Ask any contractor you consider these questions before signing anything:
- Are you licensed and insured in Georgia?
- Do you have experience working directly with insurance carriers and adjusters?
- Do you write Xactimate-compatible estimates?
- Do you use contingency agreements?
Contingency agreements protect homeowners by tying the contractor's payment to what the insurer approves, not to a price you negotiate before the scope is finalized. That structure prevents a situation where you commit to a price and then the insurer's estimate comes in lower.
Watch for red flags in contractor paperwork: large advance deposits before work begins, assignment of benefits clauses (which transfer your claim rights to the contractor), and vague scope descriptions. A reputable Georgia contractor will give you a written, itemized estimate and will not pressure you to sign before the adjuster has visited.
For a detailed post-storm inspection checklist that covers what a thorough rooftop assessment should include, that resource walks through the physical inspection process step by step.
Choosing an Atlanta-area contractor with carrier experience also speeds scheduling. Local contractors know regional storm patterns, have relationships with area adjusters, and can often get on-site faster after a major weather event than out-of-state storm chasers.
How to prepare for the insurance adjuster visit
The adjuster visit is the most consequential moment in the claim process. What gets written into the adjuster's scope becomes the baseline for your payout. Items not on that scope require a supplement to add later, which takes time and effort.
Before the adjuster arrives, prepare this checklist:
- Have your contractor on-site and ready to walk the roof with the adjuster.
- Print or have ready on your phone: your photos, the contractor's written estimate, and the NOAA storm report.
- Walk the interior with the adjuster and point out every water stain, ceiling bubble, or damaged area.
- Ask the adjuster to note specific line items: deck condition, drip edge, ice and water shield, code upgrade allowances.
- Take your own photos during the inspection, including any areas the adjuster examines.
- Ask for a copy of the adjuster's report or scope in writing before they leave, or confirm when it will be sent.
Common items adjusters miss include: deck rot beneath damaged shingles, code-required upgrades (many Georgia municipalities require updated drip edge or ice and water shield on replacement), and accurate waste factors for complex roof geometries. Your contractor can flag these in real time.
Pro Tip: Ask the adjuster directly: "Can you confirm you've noted the deck condition and any code upgrade requirements?" That question, asked politely, puts those items on the record. Follow up by requesting the written scope within 24 hours of the visit.
Having a roofing expert at the adjuster meeting is one of the most effective ways to protect your claim scope.
Typical roof claim timeline and common mistakes to avoid
A roof insurance claim from filing to final depreciation release commonly takes two months or more. The stage-by-stage breakdown below reflects median durations from claim-timeline data.
| Stage | Median duration |
|---|---|
| Filed → adjuster assigned | 4 days |
| Adjuster assigned → inspection scheduled | 7 days |
| Inspection → carrier estimate issued | 6 days |
| Carrier estimate → ACV check issued | 11 days |
| Completion docs submitted → depreciation released | 19 days |
| Total (filing to final payment) | 60+ days |
After a major storm event in the Atlanta area, every one of these stages stretches. Adjusters are overloaded, contractors are booked out, and insurers prioritize the highest-value claims. Homeowners who submit a complete documentation package at filing, stay available for inspection scheduling, and have a contractor ready to move immediately consistently see faster timelines.
The most common mistakes that delay or reduce payouts:
- Missing timestamps on photos (undated photos are easier to dispute)
- Starting permanent repairs before the adjuster inspects
- Accepting the first settlement offer without comparing it line by line to the contractor's estimate
- Not filing a supplement when the insurer's scope is clearly incomplete
- Letting the policy's filing deadline pass without opening the claim
For a full breakdown of storm claim mistakes Georgia homeowners make, that resource covers the errors that most consistently reduce final payouts.
What to do if your claim is denied or underpaid
A denial is not the end of the process. Independent documentation like NOAA weather records and a certified roofer's technical report are the most effective tools for challenging a denial or a lowball offer. Work through these steps in order:
- Request the written denial with specific reasons. The insurer must tell you in writing why the claim was denied or reduced. That written denial is the foundation of every appeal step that follows.
- Compare the denial language to your policy. Look for the exact exclusion or clause cited. If the denial references "wear and tear" but your contractor's report documents acute storm impact, that is a direct point of dispute.
- Gather independent evidence. Pull the NOAA storm report for the event date, get a signed technical report from your contractor, and compile your full photo log with timestamps.
- File an internal appeal or supplement. Submit your independent evidence to the insurer's claims department with a written request to reconsider specific line items.
- Invoke the appraisal clause if available. Many Georgia policies include an appraisal clause that allows each party to hire an independent appraiser; a neutral umpire resolves disagreements. This is faster and less expensive than litigation.
- Hire a licensed public adjuster. A public adjuster works for you, not the insurer, and takes a percentage of the final settlement. For large claims or complex denials, the cost is often recovered through higher payouts.
- File a complaint with the Georgia Department of Insurance. If the insurer is acting in bad faith or violating policy terms, the Georgia DOI accepts formal complaints and can compel a response.
Printable documentation checklist and sample claim log
Keep every item below in a single folder, named by claim number, and back it up to cloud storage. Share access with your contractor so both parties are working from the same file.
Documents to collect and save
- Wide-angle and close-up photos of all exterior damage (timestamped)
- Interior photos of water stains, ceiling damage, and affected rooms
- Continuous walkthrough video with narration
- Contractor's written, Xactimate-compatible estimate
- Signed contractor inspection report
- NOAA or National Weather Service storm report for the event date
- Emergency repair receipts (tarps, materials, labor)
- Insurer's scope of loss / adjuster's report
- All written correspondence with the insurer (emails, letters)
- Claim log (see below)
- Final repair invoices and completion photos
Sample claim log (one row shown as example)
| Date | Contact | Action taken | Attachment | Notes |
|---|---|---|---|---|
| March 12, 2025 | Jane Smith, ABC Insurance | Opened claim, received claim number | Email confirmation | Adjuster to be assigned within 4 business days |
Use timestamped filenames for every photo and document: 2025-03-12_roof-hail-damage-front-left.jpg is retrievable in seconds. A folder structure with subfolders for Photos, Estimates, Correspondence, and Receipts keeps the file organized for quick retrieval during adjuster visits or appeals.
For a wind-specific version of this checklist tailored to Georgia homeowners, the wind damage claim checklist covers the additional documentation wind events require.
How a local contractor helps you through the claim process
A local roofing contractor who handles insurance claims does more than fix shingles. From the first 24 hours through final payment, a claim-experienced contractor provides inspection and professional photos, a written Xactimate-compatible estimate, adjuster meeting support, supplement filing for missed items, and project management through repairs and lender coordination.
The right time to call is immediately after you have done your initial ground-level documentation, ideally within the first 24–72 hours. Before you sign any final settlement or permanent repair contract, a contractor review of the insurer's scope can identify gaps that are far easier to address before you accept payment than after.
Contingency agreements, used by reputable contractors, tie the contractor's compensation to what the insurer approves. That means the contractor is motivated to get the scope right, not just to close the job quickly. For Georgia homeowners, how contractors document storm damage and the specific evidence they collect is worth understanding before the adjuster arrives.
The Original Roof Repair Company, founded by Eric Manly and based in Canton, Georgia, serves Cherokee County and 11 surrounding counties across the Atlanta metro. The company is BBB accredited and takes a repair-first approach: recommending full replacement only when repair costs exceed $4,000 and replacement is the more cost-effective path. For insurance claims, the team documents damage, meets adjusters, files supplements, and manages the repair or replacement process through to final payment.
One practical note for Atlanta-area homeowners with mortgages: most lenders require insurance checks to be issued to both the homeowner and the mortgage servicer. Lenders typically release funds in stages, which affects when your contractor can be paid and when work can be scheduled. Plan for that timing and communicate it to your contractor early.
Key Takeaways
Filing a roof insurance claim successfully requires documenting damage within the first 24–72 hours, getting a written contractor estimate before the adjuster arrives, and reviewing every line item before accepting any settlement offer.
| Point | Details |
|---|---|
| Document first, file second | Timestamped photos, video, and a contractor report before the adjuster visits protect your full claim scope. |
| ACV vs. RCV changes your payout | RCV policies release depreciation after repairs; ACV policies do not, making policy type a major financial factor. |
| Claims can take 60+ days | Median stage durations typically add up to 60 days or more from filing to final depreciation release; submit a complete file at the start to avoid delays. |
| Supplements recover missed items | Independent contractor estimates that are Xactimate-compatible make it straightforward to identify and file for line items the adjuster omitted. |
| The Original Roof Repair Company | Serves Atlanta and the surrounding Georgia metro with inspection, adjuster advocacy, supplement filing, and repair-first claim support. |
What most homeowners get wrong about roof claims
The conventional advice is to call your insurer first. That is backwards. The single most protective action you can take is getting a professional contractor on your roof before the adjuster ever shows up. Adjusters are not adversaries, but they are working from a checklist that favors efficiency. A contractor who has reviewed the damage in detail, written a technical report, and identified code upgrade requirements walks into that adjuster meeting with a specific, documented position. A homeowner who called the insurer first and waited is starting from a weaker position.
The second thing most guides understate is the mortgage endorsement problem. When an insurer issues a check to both you and your lender, the lender's endorsement process can add weeks to your timeline. Some servicers require inspections before releasing funds. That delay affects your contractor's draw schedule and, in turn, the repair timeline. Atlanta-area homeowners with FHA or VA loans should contact their servicer's loss draft department the same week they open the claim, not after the check arrives.
Contract mistakes are the third area where homeowners consistently lose money. Assignment of benefits clauses, buried in some contractor agreements, transfer your claim rights to the contractor. Once signed, you lose direct control over the claim. Read every contractor agreement before signing, and if you see an assignment of benefits clause, ask for it to be removed. A contractor who refuses that request is not the right partner for this job. The Original Roof Repair Company's repair-first approach and transparent pricing reflect the kind of straightforward relationship homeowners should expect from any contractor they bring into a claim.
The Original Roof Repair Company handles the hard parts of your claim
Navigating a roof insurance claim while managing a damaged home is genuinely difficult. The Original Roof Repair Company gives Atlanta-area homeowners a concrete advantage: professional inspection and documentation within the first 24–72 hours, an Xactimate-compatible estimate that holds up against the insurer's scope, and a contractor who meets the adjuster on your behalf and files supplements when items are missed.

The company serves Cherokee County and 11 surrounding Georgia counties, covering the full Atlanta metro. The process starts with a free inspection and claim consultation. Bring your policy declarations page, any photos you have already taken, and your claim number if you have opened the claim. The team handles documentation, adjuster coordination, and project management through to final payment, including lender endorsement guidance for homeowners with mortgages.
For immediate storm damage, emergency roof repair and tarping services are available to stop further damage while the claim moves forward. For the full claim advocacy service, the roof insurance claims page explains exactly what the process looks like from inspection to final check. Contact The Original Roof Repair Company to schedule your inspection and get the claim started on the right footing.
Useful sources and Georgia state resources
Use these primary sources during your claim and any appeal:
- NOAA / National Weather Service (weather.gov): Search by date and zip code to pull official storm reports documenting wind speed, hail size, and storm track. Print or save the PDF and attach it to your claim file.
- Georgia Department of Insurance (oci.ga.gov): File a formal complaint if your insurer denies a valid claim or acts in bad faith. The DOI can compel a written response and review the insurer's handling of your claim.
- Consumer Financial Protection Bureau (consumerfinance.gov): The CFPB publishes guidance on how insurers pay out claims, including the mortgage endorsement process, which is directly relevant for Atlanta homeowners with lenders on their policy checks.
- Your state policy filing deadline: Georgia law does not set a universal deadline, but most policies specify one. Check your declarations page and note the date in your claim log immediately.
FAQ
What are the main stages of a roof insurance claim?
The four core stages are: filing the claim and getting a claim number, the adjuster inspection, reviewing and negotiating the settlement (including supplements), and completing repairs to trigger final payment. Each stage has its own documentation requirements.
How long does a roof insurance claim typically take?
From filing to final depreciation release, median timelines show most roof claims take 60 days or more. Adjuster assignment and inspection scheduling typically take one to two weeks in total, the carrier estimate and ACV check follow, and the depreciation release after completion documentation is commonly issued within 19 days.
What do insurance adjusters look for on roofs?
Adjusters look for evidence of a covered peril (hail strikes, wind damage, missing shingles) versus pre-existing wear. They also assess deck condition, flashing, and gutters. Common items they miss include code upgrade requirements, deck rot beneath damaged shingles, and accurate waste factors for complex roof shapes.
What should you never say to a roof insurance adjuster?
Do not speculate about cause, minimize the damage, or agree to a settlement on the spot. Avoid describing the roof as "old" or "already having issues" without context. Stick to documented facts: the storm date, what you observed, and what your contractor's written report states.
Can The Original Roof Repair Company help with the adjuster visit?
Yes. The Original Roof Repair Company meets adjusters on-site for Atlanta and surrounding Georgia homeowners, provides a written Xactimate-compatible estimate, and files supplements for items the adjuster's scope misses. Contact the company within the first 24–72 hours of discovering damage for the strongest claim position.