
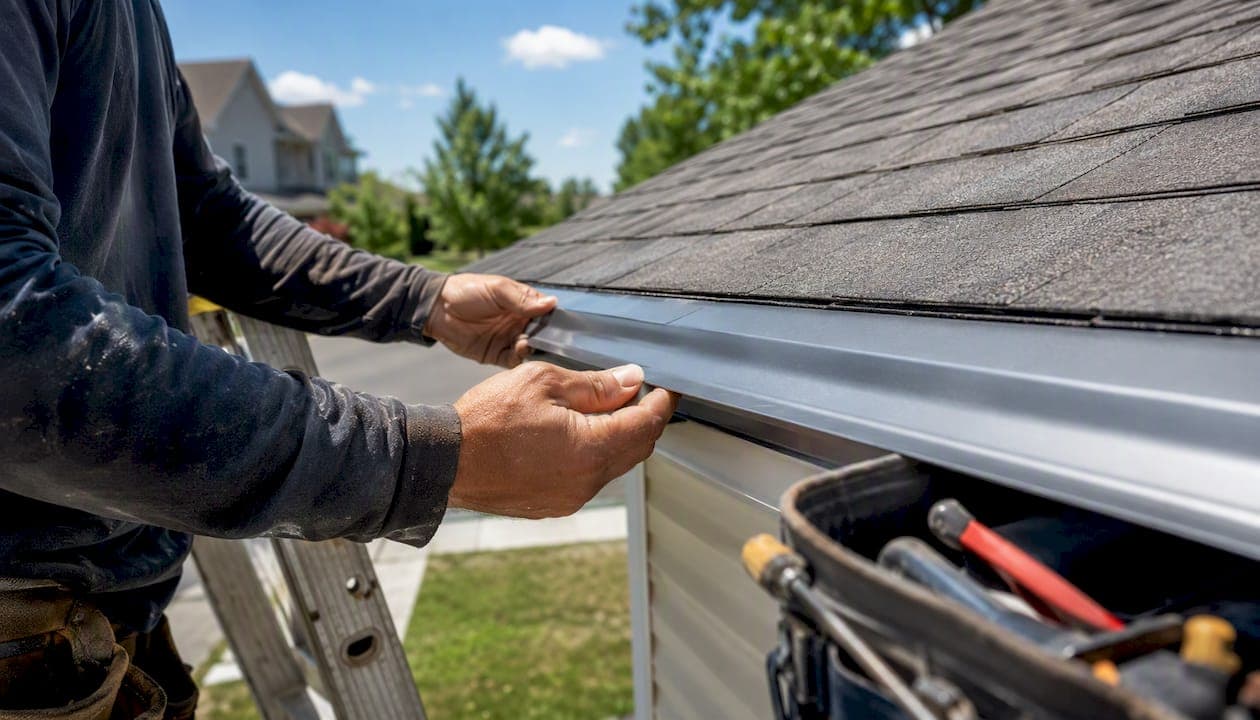
A drip edge is a metal flashing strip installed along the edges of your roof that directs water away from the fascia and into the gutters, while preventing moisture from wicking back under your shingles. Per IRC R905.2.8.5, it is required on all asphalt shingle roofs at both eaves and rakes. Understanding the role of drip edge is the first step toward protecting your roof deck, fascia, and gutters from the kind of slow water damage that rarely shows up until it is expensive.
Two things you can do right now:
- Look at your roof edge from the ground. A properly installed drip edge is a thin metal strip visible just below the first course of shingles, overhanging the fascia board. If you see bare wood, exposed underlayment, or shingles that appear to end flush with the fascia, drip edge may be missing or failed.
- Call for a free inspection if you are unsure. The Original Roof Repair Company offers free roof inspections in the Atlanta metro area and nearby counties. If your drip edge is missing, loose, or rusted through, that is a repair worth addressing before the fascia rots.
Key Takeaways
Drip edge is required by code on every asphalt shingle roof, and correct installation at both eaves and rakes is the single most effective way to prevent fascia rot and water intrusion at the roof edge.
| Point | Details |
|---|---|
| Code requirement | IRC requires drip edge at eaves and rakes, corrosion-resistant metal, fasteners no more than 12 inches on center, and flange extending at least 1/4 inch below the sheathing and at least 2 inches onto the roof deck. |
| Correct sequencing | At eaves, drip edge goes under underlayment; at rakes, it goes over. Reversed sequencing is a common code violation. |
| Material choice | Aluminum suits most Atlanta-area homes; galvanized steel works inland; copper is a long-term premium option. |
| Inspect annually | Check for rust, detached sections, and fascia staining each year and after major storms. |
| The Original Roof Repair Company | Provides free inspections, drip-edge repair, and insurance claim documentation across Cherokee County and 11 surrounding Georgia counties. |
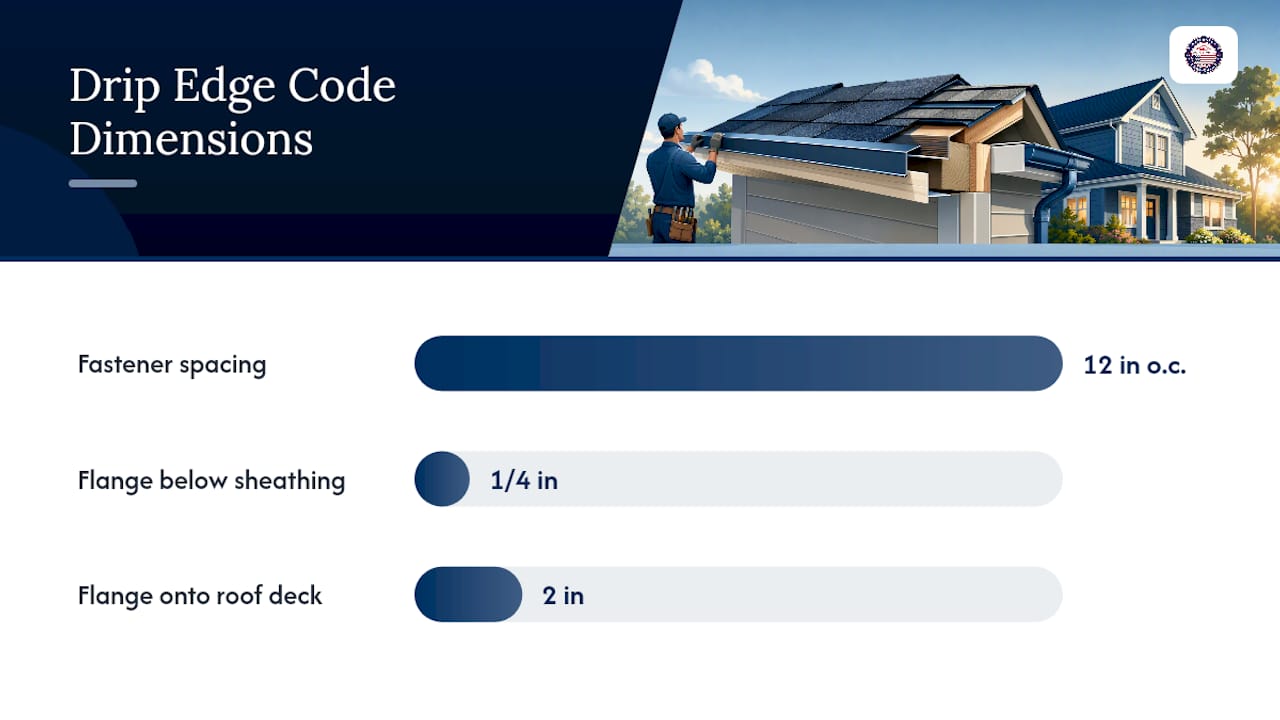
Table of Contents
- What role does drip edge play in protecting your roof?
- What types and materials are available for drip edge?
- What does the building code require for drip edge?
- How is drip edge installed, and what is the correct sequence?
- How do you spot a failing drip edge before it causes bigger problems?
- What does drip edge repair or replacement typically cost?
- Should you DIY drip edge installation, or hire a pro?
- What we see on Atlanta-area roofs, and what you can do about it
- The Original Roof Repair Company handles drip edge repair across the Atlanta area
- Sources
- FAQ
What role does drip edge play in protecting your roof?
Drip edge does more than redirect rainwater. It manages the entire edge of your roof assembly, and when it fails, the damage spreads quietly into the fascia, soffit, and deck before most homeowners notice anything is wrong.
The primary functions, according to IKO's manufacturer guidance, are directing water away from the fascia and into gutters, and preventing capillary wicking, where water is drawn back under shingles by surface tension rather than gravity. Without drip edge, even a light rain can pull moisture horizontally under the shingle edge and into the roof deck.
Wind-driven rain makes this worse. During a Georgia storm, rain does not fall straight down. It hits the roof edge at an angle, and without a metal flange redirecting it, water runs directly behind the gutter and soaks the fascia. Over time, that fascia board softens, the gutter pulls away, and the deck begins to rot from the edge inward. Drip edge changes that outcome by physically blocking the water's path.
Specific drip edge benefits include:
- Fascia rot prevention: Keeps water off the wood fascia board behind the gutter
- Reduced ice-dam damage: Limits meltwater from backing up under shingles at the eave
- Improved gutter performance: Channels water cleanly into the gutter trough rather than behind it
- Extended shingle life: Supports the shingle edge so it does not curl, crack, or lift at the eave
- Pest deterrence: Closes the gap between the roof deck and fascia that insects and small animals use as an entry point
For high-wind areas, JLC Online notes that the Fortified Home program recommends overlapping drip-edge sections by more than the minimum and using a denser fastener pattern to improve wind resistance, a meaningful upgrade over minimum code in storm-prone regions.
What types and materials are available for drip edge?
Common profile shapes
Three profiles cover most residential applications:
- L-style (Type C): The basic right-angle profile. Works on standard-slope roofs where the fascia is plumb and the overhang is minimal.
- Extended/hemmed (Type D or F): Has a longer horizontal leg that extends further over the fascia. Better for roofs with wider overhangs or where the fascia has a slight outward lean. The hemmed edge adds stiffness and a cleaner drip point.
- Fascia-style (Type F): A three-bend profile that wraps the fascia face. Common on older homes and on reroofs where the fascia profile is irregular.
At eaves, the drip edge sits directly on the deck before underlayment goes down. At rakes, it goes over the underlayment. Profile choice depends on the fascia geometry and the roof slope, not just aesthetics.
Material comparison
Galvanized steel is the most common choice for inland Georgia homes. It holds up well in standard conditions, but the cut ends can rust if left unprotected, so quality installation matters.
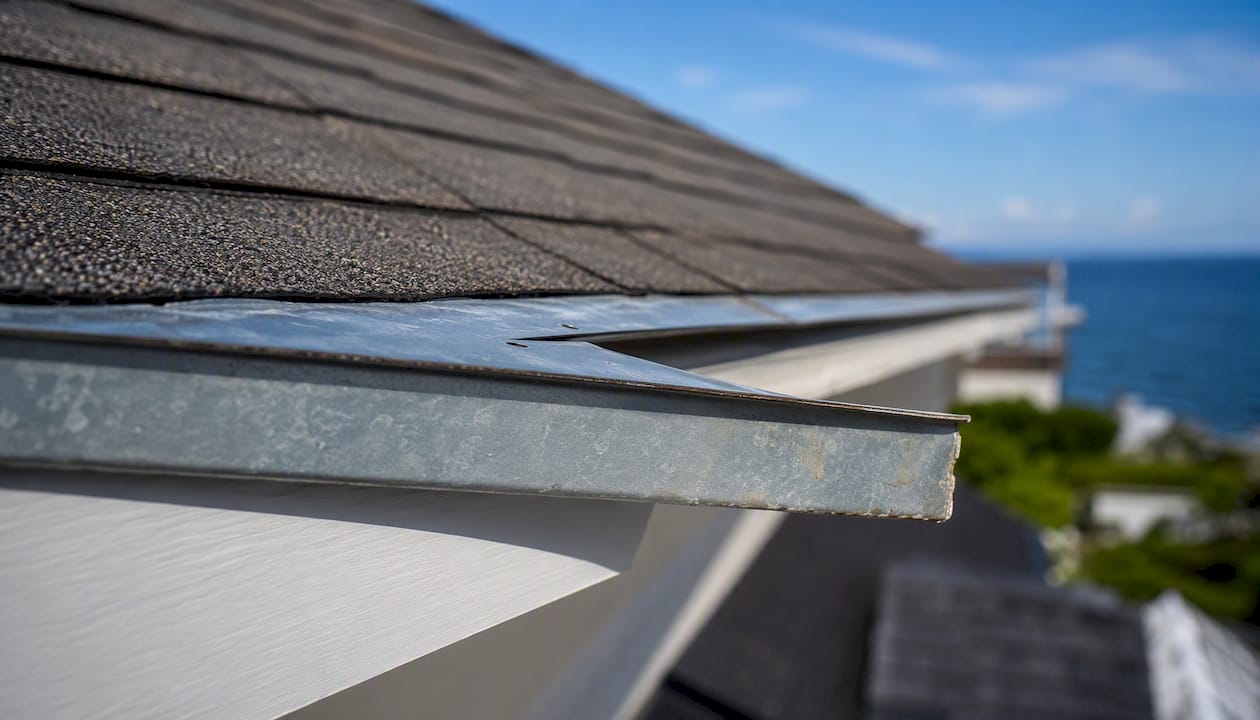
Aluminum is the better call for homes near the Georgia coast or in areas with persistent humidity. It does not rust, costs only slightly more than steel, and is the default recommendation for most Atlanta-area reroofs.
Copper is a long-term investment. It outlasts the roof itself and requires no maintenance, but the material cost alone puts it out of reach for most standard repairs.
Pro Tip: For homes in the Atlanta metro and Cherokee County, aluminum is the practical default. If your home is within 50 miles of the Georgia coast or sits in a low-lying area with standing water near the foundation, aluminum is worth the modest price premium over galvanized steel.
What does the building code require for drip edge?
IRC R905.2.8.5 sets the minimum standard for drip edge on asphalt shingle roofs in plain terms:
- Drip edge is required at both eaves and rakes
- Material must be corrosion-resistant metal (galvanized steel, aluminum, or copper all qualify)
- Sections must overlap at least 2 inches
- Fasteners must be spaced no more than 12 inches on center
- The flange must extend at least 1/4 inch below the roof sheathing and back onto the deck at least 2 inches
Jaspector's code explainer notes that incorrect sequencing (drip edge over underlayment at eaves, or under it at rakes) is one of the most common code violations inspectors find, and it leads to fascia rot that develops invisibly over years.
Building codes have required drip edge on asphalt shingle roofs since 2012. Despite that, JLC Online reports that contractors still omit it on reroofs, creating a common inspection failure.
Homeowner inspection checklist:
- Metal drip edge is present and visible at both eaves and rakes
- Material is metal, not plastic or painted wood trim
- Flange extends at least 2 inches onto the roof deck
- Sections overlap at least 2 inches at joints
- Fasteners are visible and spaced no more than 12 inches apart
- At eaves: drip edge is under the underlayment
- At rakes: drip edge is over the underlayment
- No visible rust, holes, or sections pulling away from the fascia
Manufacturer guidance adds another layer. GCP Applied Technologies recommends placing metal drip edge over self-adhered underlayments at the eave to avoid permanent membrane exposure. IKO similarly recommends following product-specific detail drawings rather than assuming a single universal sequence applies. Code sets the floor; manufacturer details often raise it.
Code callout: Building codes require drip edge at eaves and rakes on asphalt shingle roofs, made from corrosion-resistant metal, with fasteners spaced closely and sections overlapped at least 2 inches.
How is drip edge installed, and what is the correct sequence?
Getting the sequence right is where most DIY and even some contractor installs go wrong. The rule is simple: eaves under, rakes over.
Eave installation sequence
- Clean the eave edge and confirm the fascia is sound.
- Set the drip edge on the bare deck at the eave, with the flange extending at least 2 inches onto the deck and at least 1/4 inch below the sheathing edge.
- Fasten with roofing nails or screws, no more than 12 inches on center.
- Overlap sections at least 2 inches, working from one end to the other.
- Install underlayment over the drip edge at the eave. The underlayment laps over the top of the drip edge so water that gets under the shingles runs onto the drip edge and into the gutter.
Rake installation sequence
- After underlayment is installed on the field of the roof, bring it to the rake edge.
- Install drip edge over the underlayment at the rake. This directs wind-driven rain that hits the rake edge over the underlayment rather than under it.
- Fasten and overlap the same way as at the eave.
Ice-and-water shield sequencing
This is where the question "does ice and water go over or under drip edge?" comes up most often. At the eave, the standard sequence is: drip edge first on the deck, then ice-and-water shield over the drip edge. Grace Ice & Water Shield product literature from GCP warns against leaving the membrane exposed at the edge without drip edge or gutter protection.
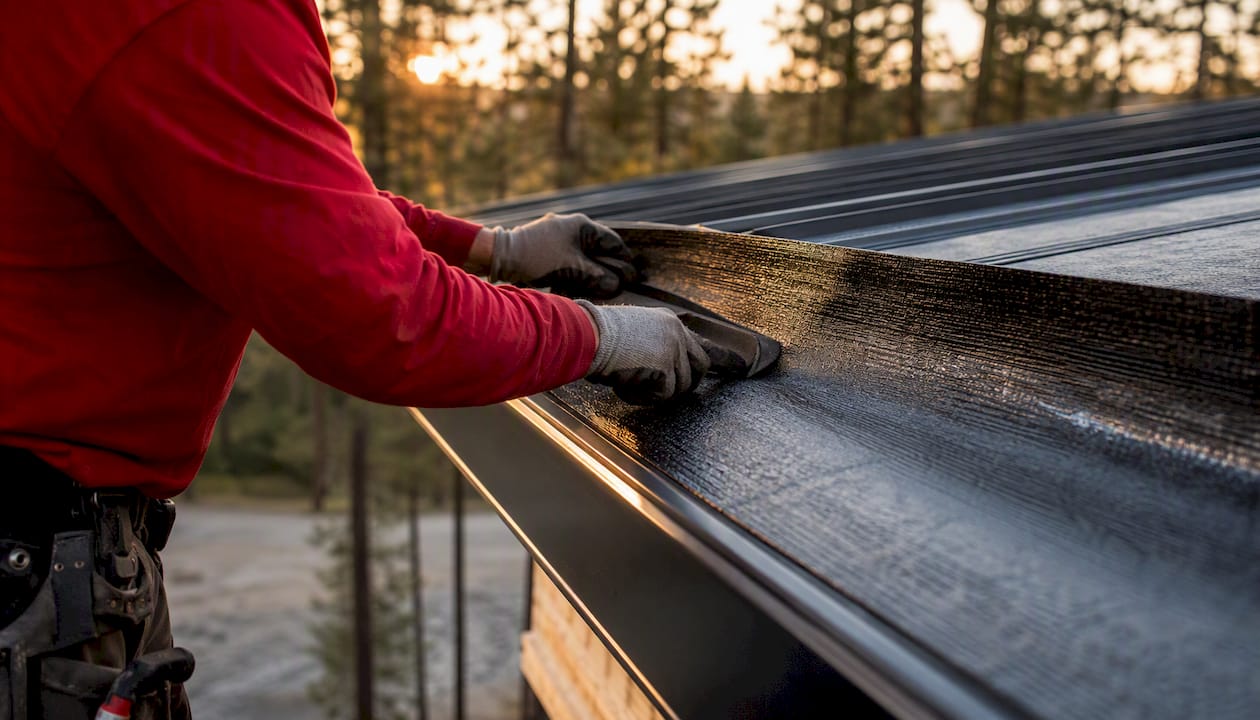
In ice-dam-prone areas, Fine Homebuilding describes a hybrid approach: install a narrow strip of membrane over the fascia-deck joint first, then set the drip edge over it, then apply the full ice-and-water barrier over the drip edge. This seals the joint where meltwater most often backs up. Georgia's higher-elevation pockets, particularly in the North Georgia mountains near Cherokee County, can see enough ice accumulation to warrant this detail.
Always consult the specific membrane manufacturer's detail drawings. GCP's technical guidance notes that placement requirements vary by product, and following a generic sequence without checking the product sheet is a common field error.
How do you spot a failing drip edge before it causes bigger problems?
Most drip edge failures are visible from the ground or from a ladder at the eave. You do not need to walk the roof to do a basic check. A routine annual inspection and a post-storm walkthrough cover the majority of issues before they become structural.
Signs to look for:
- Visible rust streaks or orange discoloration along the roof edge or fascia
- Sections of drip edge that are bent outward, missing, or visibly detached
- Water stains on the fascia board or soffit, especially after rain
- Shingles that appear to hang past the fascia with no metal visible beneath them
- Gaps where the underlayment is exposed at the rake or eave
- Gutters pulling away from the fascia (often caused by water rotting the fascia behind the gutter)
- Soft or spongy fascia board when pressed (a sign of sustained moisture intrusion)
Three conditions that mean replacement is needed, not just a patch:
- Advanced rust or holes in the metal. Surface rust on galvanized steel can sometimes be treated, but through-rust means the flashing is no longer directing water.
- Fascia rot behind the drip edge. If the fascia board is soft, the drip edge has already failed long enough for water to penetrate. Replacing the drip edge without addressing the fascia leaves the problem half-solved. See how to identify roof decking damage for signs that the damage has spread further.
- Wind detachment or significant gaps. A drip edge that has lifted or separated from the deck in multiple spots will not redirect water reliably and needs full replacement.
Maintenance cadence: A visual check once a year and after any major storm covers most situations. Keep gutters clear so water does not back up against the drip edge, and re-secure any loose sections with appropriate roofing nails before the next rain event. A property maintenance routine that includes roof-edge checks each fall and spring is the simplest way to catch these issues early.
What does drip edge repair or replacement typically cost?
Cost depends on several variables, and the range is wide enough that a line-item quote from a contractor is the only reliable number for your specific roof.
Factors that affect price:
- Material choice: Aluminum costs less than copper; galvanized steel falls in the middle
- Linear footage: A small ranch home may need 150–200 linear feet; a larger two-story can run 300 feet or more
- Roof accessibility: Steep slopes and second-story eaves increase labor time
- Condition of the fascia: If fascia boards need replacement, that adds material and labor
- Standalone vs. reroof integration: Adding drip edge during a full reroof is significantly cheaper per linear foot than a standalone retrofit, because the underlayment and shingles are already being removed
The Roofing Brief's 2026 guide notes that adding drip edge during a reroof is low-cost relative to the fascia repair bills it prevents. A standalone drip-edge retrofit on an existing roof costs more per linear foot because the contractor must carefully lift shingles and underlayment at the edge to install correctly.
Timeline: A drip-edge-only repair on a typical single-story home takes half a day to a full day. When done as part of a reroof, it adds minimal time because the edge is already exposed.
Buyer tip: Ask for a line-item quote that separates material cost, labor, and any fascia repair. Confirm the fastener gauge and material spec match IRC requirements. Request before-and-after photos for your records and for any future insurance documentation.
Should you DIY drip edge installation, or hire a pro?
Decision checklist
- Are you comfortable on a ladder at roof height? Drip edge work requires working at the eave and rake, often on a ladder. If that is not comfortable, hire a pro.
- Do you know the correct eave vs. rake sequence? Getting it backwards is a code violation and creates the exact water problem you are trying to prevent.
- Is the fascia in good condition? If the fascia is soft or rotted, the repair scope expands beyond what most homeowners should handle alone.
- Is this a standalone repair or part of a reroof? Lifting existing shingles and underlayment to retrofit drip edge without disturbing the roof assembly is a skilled task.
- Does your homeowner's insurance cover the damage? If storm damage caused the failure, a professional contractor can document the damage for a claim. A DIY repair may void that option.
- Are you in a high-wind or ice-dam-prone area? The hybrid ice-dam sequencing described by Fine Homebuilding is not a beginner install. North Georgia homeowners in elevated areas should hire a pro for this detail.
For guidance on where the DIY/hire line sits, this breakdown of when to call a roofing professional covers the specific thresholds clearly.
Questions to ask any contractor
- Do you carry general liability and workers' compensation insurance? (Request certificates.)
- Are you licensed in Georgia?
- Can you provide references and photos from recent drip-edge or reroof jobs?
- Will your quote include a line item for drip edge material and fastener specs?
- What warranty do you offer on labor and materials?
- Will you pull a permit if required, and handle the inspection?
Red flags to watch for:
- No written quote or a quote that does not list drip edge as a separate line item
- Fastener specs not mentioned or vague ("standard nails")
- Refusal to show photos of completed work
- No proof of insurance when asked
- Pressure to decide before they leave the property
Pro Tip: Ask any contractor to show you a site-specific detail drawing for eave and rake sequencing, including how the ice-and-water shield integrates at the eave. A contractor with genuine Georgia/Atlanta experience will know the local code adoption status and will not hesitate to walk you through the sequence.
What we see on Atlanta-area roofs, and what you can do about it
The most common drip-edge failures we find on Atlanta-area homes fall into a predictable pattern. Wrong sequencing at the eave is the most frequent: drip edge installed over the underlayment instead of under it, which means water that gets under the shingles runs behind the drip edge rather than over it and into the gutter. The second most common issue is an undersized flange, less than 2 inches onto the deck, which leaves the deck edge exposed to wicking. Both failures are invisible from the ground until the fascia starts to show water stains.
Georgia's storm season creates specific edge-damage patterns. Wind-driven rain during summer thunderstorms hits the rake edge hard, and drip edge that was not fastened at the correct spacing lifts and separates. In the higher-elevation areas of Cherokee County and the North Georgia foothills, ice accumulation in winter can push meltwater under a drip edge that was installed without the hybrid membrane detail. We also see gutter-related failures where gutters filled with debris hold standing water against the drip edge long enough to rust through galvanized steel in five to seven years rather than the expected twenty.
When we document storm damage for insurance claims, drip-edge condition is one of the first things we photograph. A missing or detached drip edge after a wind event is often a covered loss, and having before-and-after photos makes the claim straightforward. Homeowners who photograph their roof edge before storm season and after major storms are in a much stronger position when working with an adjuster.
Three things you can do right now:
- Photograph your roof edge from the ground before the next storm season
- Keep gutters clear so water does not pool against the drip edge
- Schedule an inspection after any storm with winds above 50 mph or significant hail
The Original Roof Repair Company handles drip edge repair across the Atlanta area
Drip-edge failure is exactly the kind of repair that larger roofing companies often skip past in favor of a full replacement quote. The Original Roof Repair Company takes the opposite approach: diagnose the actual problem, repair what needs repairing, and recommend replacement only when the numbers make it the smarter choice.

For Atlanta-area homeowners, the service includes free roof inspections, drip-edge repair and replacement, full reroof with code-compliant edge details, and insurance claim documentation for storm-related damage. The company serves Canton, Cherokee County, and 11 surrounding counties within a 35-mile radius of the Atlanta metro. If you have visible fascia staining, loose drip edge, or a roof that has never had drip edge installed, request a roof repair estimate and get a clear, line-item quote with no pressure to decide on the spot.
Sources
These are the authoritative references used throughout this article. Each one is worth bookmarking if you are working with a contractor or preparing for a permit inspection.
- Guide to Drip Edges for Shingle Roofs - IKO
- GCP technical letter — Roof eave application (GCP Applied Technologies)
- Ice-dam protection eave and drip edge — FineHomeBuilding
- IRC 2024 Drip Edge Flashing: Required at Eaves and Rakes for Asphalt Shingles | R905.2.8.5 | Jaspector
- Drip Edge: Installation + Code Requirements 2026 | The Roofing Brief
- Drip edge and the IRC — JLC Online
FAQ
What happens if a roof has no drip edge?
Without drip edge, water runs off the shingles directly onto the fascia board and behind the gutter, causing rot, gutter separation, and eventual deck damage at the edge. Over time, the repair cost far exceeds what drip edge installation would have cost.
Does ice-and-water shield go over or under drip edge?
At the eave, the standard sequence is drip edge on the deck first, then ice-and-water shield over it. In ice-dam-prone areas, some professionals use a hybrid detail where a narrow membrane strip goes under the drip edge to seal the fascia-deck joint, per Fine Homebuilding's practitioner guidance. Always follow the membrane manufacturer's specific product instructions.
Is drip edge necessary on a shed?
The code applies to asphalt shingle roofs on structures it covers. Many sheds fall outside residential code jurisdiction, but adding drip edge to any shingled structure protects the fascia and deck from the same water damage it prevents on a house. It is low-cost insurance regardless of strict requirements.
Should drip edge go into the gutter?
Yes. The drip edge should extend over the front lip of the gutter so water flows cleanly from the shingle edge into the gutter trough. If the drip edge terminates behind the gutter, water can run down the fascia and behind the gutter, defeating its purpose.
How often should drip edge be inspected or replaced?
A visual check once a year and after any major storm is the standard maintenance cadence. Aluminum drip edge typically lasts 30–50 years under normal conditions; galvanized steel lasts 20–30 years but may rust sooner if the cut edges are not protected. Replace it when you see through-rust, holes, or sections that have detached from the fascia.