
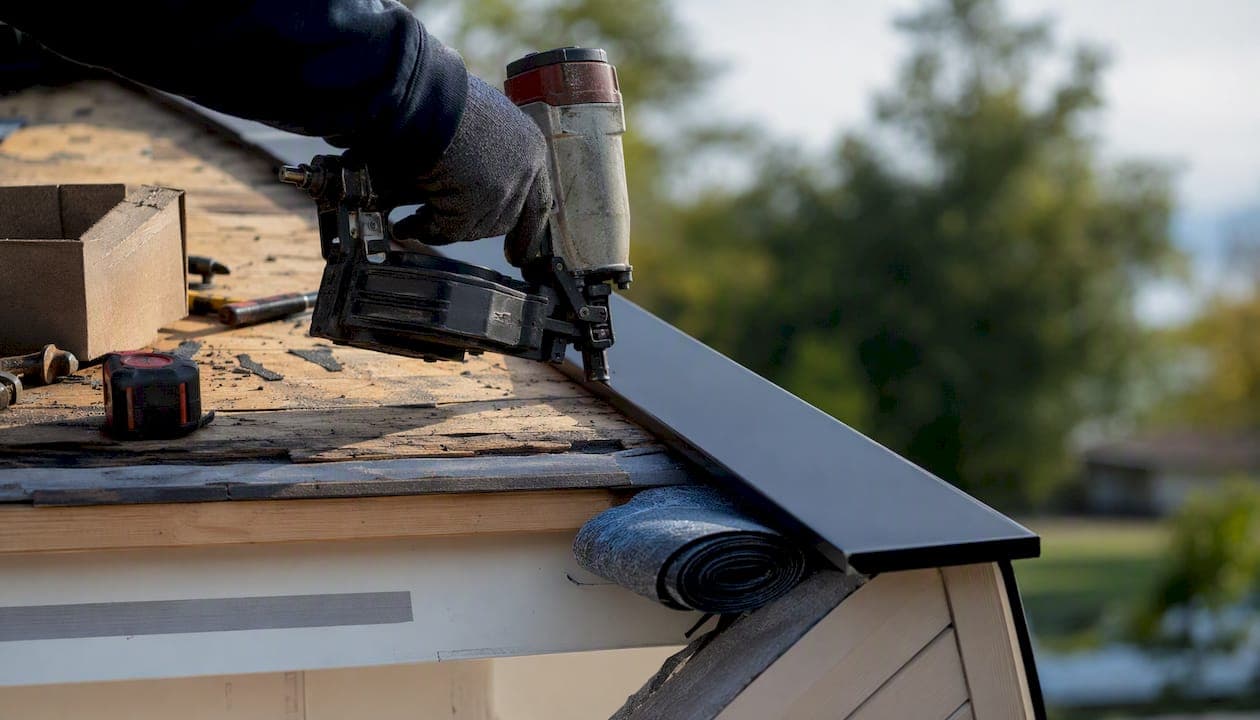
A rake edge is the sloped, gable-end edge of your roof, and the term also covers the trim, flashing, or rake board that finishes and protects that edge. Protection at the rake is strongly recommended for every gabled home and is often required by shingle manufacturer guidelines and local building codes. One quick clarification worth making upfront: "rake edge" describes a location on your roof, while "drip edge" refers to a specific metal flashing product. The two terms overlap because drip-edge-style metal is commonly installed at the rake, but they are not interchangeable. On a standard gabled home, you have two rake edges, one on each gable end, running from the ridge down to the eave corner.
Key Takeaways
The rake edge is the sloped gable-end edge of a roof, and proper flashing at that location is one of the most cost-effective protections a homeowner can maintain.
| Point | Details |
|---|---|
| Rake edge definition | The sloped gable-end edge of a roof, plus the flashing and trim that protect it from water and wind. |
| Rake vs. drip edge | "Rake edge" is a location; "drip edge" is a metal flashing product installed at both eaves and rakes with different sequencing at each. |
| Installation sequence matters | Drip edge goes under underlayment at eaves and over underlayment at rakes; reversing this sequence can void shingle warranties. |
| Fastener spacing | Roofing nails at 8–10 inches on center; never nail into the vertical flange of the drip-edge metal. |
| The Original Roof Repair Company | Offers free inspections, insurance documentation, and repair-first service across Cherokee County and the Atlanta, Georgia metro area. |
Table of Contents
- What are the parts of a rake edge, and what styles will you see?
- How does a rake edge differ from a drip edge?
- Why protecting the rake edge matters for your roof's durability
- What materials and flashing profiles are used at the rake?
- What does a correct rake-edge installation look like?
- How to inspect your rake edge and spot common problems
- What does rake-edge repair or replacement typically cost?
- When should you call a roofer about the rake edge?
- A roofer's perspective on rake edges in Georgia
- Get a free rake-edge inspection from The Original Roof Repair Company
- Sources
- FAQ
What are the parts of a rake edge, and what styles will you see?
The rake is the sloped edge that runs along the end wall of a gable roof, from the ridge at the top down to the eave at the bottom. Several components work together at this location.
Key parts of the rake assembly:
- Rake board (verge board): The trim board running along the sloped edge, typically wood or a wood composite, that closes off the roof framing at the gable end.
- Rake flashing / drip-edge metal: A metal strip, usually aluminum or galvanized steel, installed at the shingle termination to direct water off the deck and away from the rake board.
- Underlayment edge: The layer of felt or synthetic underlayment that laps over the rake flashing on the rake side (the reverse of the eave sequence).
- Shingle termination: Where the shingles end at the rake, either trimmed flush with the flashing or slightly overhanging it.
Common rake styles vary significantly in both appearance and cost. Fine Homebuilding's design guide classifies rakes as either overhanging or clipped, with overhanging rakes further divided into open or closed and extended or short.
- Open rake: The rafter tails are exposed beneath the overhang, giving a craftsman or traditional look.
- Closed (boxed-in) rake: A soffit panel encloses the underside of the overhang, cleaner and more weather-resistant.
- Clipped rake: Little to no overhang; the roof terminates close to the wall plane, common on contemporary and cottage-style homes.
- Extended rake: A longer overhang that shades the gable wall and adds architectural character.
- Short rake: A modest overhang, the most common residential detail.
Architectural choice strongly affects curb appeal, but the functional requirement for a sealed, moisture-proof edge is constant regardless of style. Modern metal flashing is recommended for longevity, particularly in Georgia's climate of heavy summer storms and occasional freeze-thaw cycles.
The rake style you choose should match your eave detail. A closed, boxed eave paired with an open rake looks unfinished. Consistency between eave and rake details is what gives a roofline a polished, intentional appearance.
Pro Tip: When reviewing contractor bids, ask specifically whether the rake board is wood, PVC-wrapped, or composite. In Atlanta's humid summers, untreated wood rake boards are a common source of early rot.
How does a rake edge differ from a drip edge?
Homeowners frequently use these terms interchangeably, but the distinction matters for both installation and inspection.
A drip edge is a metal flashing product, typically an L-shaped or T-shaped aluminum or galvanized steel strip, installed at the perimeter of the roof deck. A rake edge is a location, specifically the sloped gable end of the roof. As Carden Roofing explains, "rake edge" typically refers to the sloped gable edge location while "drip edge" refers to the metal flashing product. Drip-edge metal is installed at both eaves and rakes, but the installation sequence differs at each location.
| Feature | Eave (Bottom Edge) | Rake (Sloped Gable Edge) |
|---|---|---|
| Primary water threat | Runoff, ice dams, capillary backup | Wind-driven rain, shingle lift |
| Drip edge position | Under the underlayment | Over the underlayment |
| Shingle starter | Installed over drip edge | Installed over underlayment |
| Key failure mode | Ice dam infiltration, fascia rot | Shingle uplift, rake board rot |
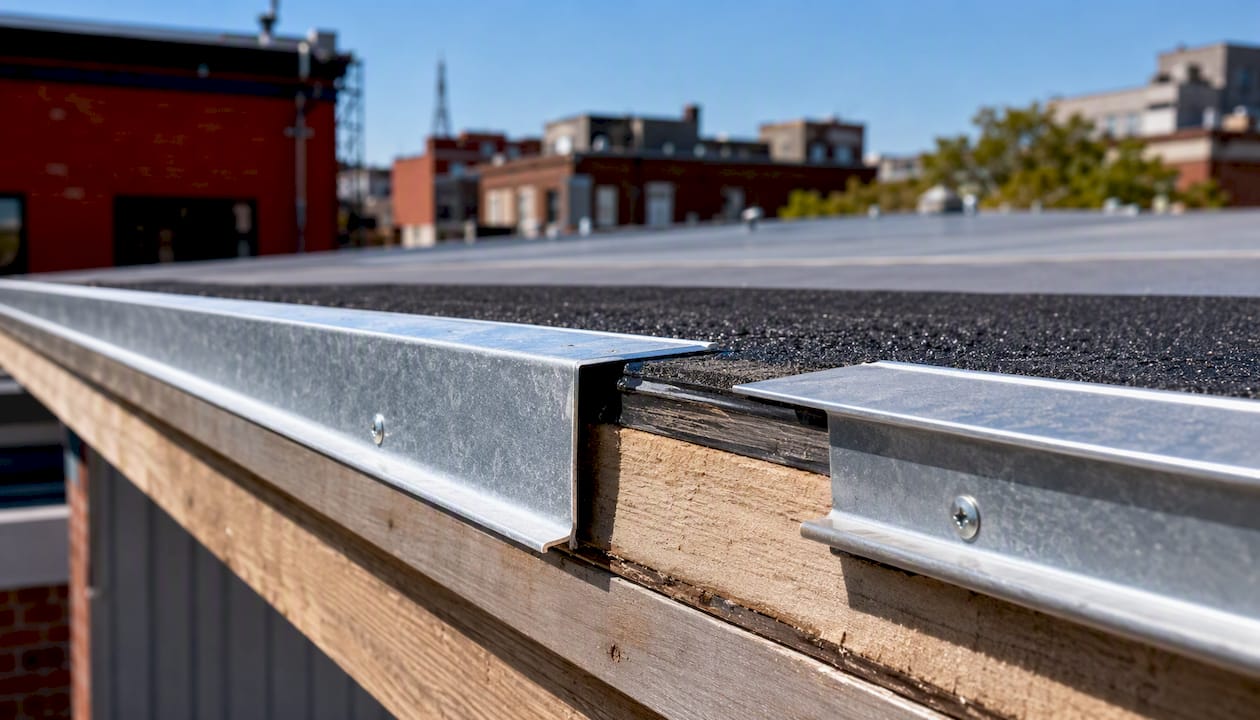
The water-shedding goals differ at each location. At the eave, the priority is preventing water from backing up under shingles during heavy rain or ice events. At the rake, the priority is blocking wind-driven rain from getting behind the shingle edge and into the roof deck or wall assembly.
Pro Tip: Per ARMA's installation guidance, drip edge goes under the underlayment at eaves and over the underlayment at rakes. Getting this sequence backward voids most shingle manufacturer warranties and leaves the deck vulnerable.
Why protecting the rake edge matters for your roof's durability
The rake is one of the most exposed parts of a gabled roof. Wind hits the gable end directly, and without proper flashing and shingle termination, that exposure translates into real damage over time.
Primary functions of a properly finished rake edge:
- Wind-driven rain resistance: Metal flashing at the rake channels water off the deck rather than letting it wick behind the shingle edge.
- Shingle lift prevention: Correct fastening and flashing at the rake reduces the chance of shingles peeling back from the gable end during high-wind events.
- Rot and mold protection: A Plus Exterior's installation guide notes that drip edge and rake flashing direct water away from vulnerable wood structures and reduce the risk of rot, mold, and roof deck deterioration.
- Ice dam vulnerability reduction: In climates with freeze-thaw cycles, proper edge metal limits the zone where ice can form and force water back under shingles.
- Deck and siding protection: Without a finished rake, water running off the edge can saturate the gable-end siding and wall framing below.
Rake zones also carry elevated wind uplift forces compared to the field of the roof. In storm-prone areas like the Atlanta metro, that uplift risk is a real concern after severe weather.
Code and manufacturer note: Local building codes and shingle manufacturer installation instructions often specify minimum fastener patterns and underlayment requirements at perimeter edges. Check your jurisdiction's requirements through the ICC code lookup and confirm your contractor follows the shingle brand's own installation manual.
What materials and flashing profiles are used at the rake?
Rake flashing and trim come in several substrates and profiles. What you see on an estimate depends on the roof type, the contractor's preference, and your budget.
Common substrates:
- Aluminum: Lightweight, corrosion-resistant, and available in a range of factory colors. The most common choice for residential shingle roofs in Georgia.
- Galvanized steel: Stronger and slightly heavier than aluminum; used where additional rigidity is needed. Susceptible to rust if the coating is damaged.
- Copper: Long-lasting and attractive, but significantly more expensive. Typically reserved for high-end or historic homes.
- PVC-wrapped or composite rake boards: Resist moisture and rot better than bare wood; a practical upgrade in humid climates.
Common flashing profiles:
- L-shape (90°): The standard drip-edge profile, with one leg lying flat on the deck and one leg hanging over the edge. Simple and effective.
- T-shape or D-shape: A wider profile that covers more of the fascia or rake board face, offering better coverage and a cleaner finished look.
- Custom rake trim: Used on metal roofing systems to seal the panel edge and create a finished appearance; profiles vary by panel manufacturer.
For shingled roofs, RPS Metal Roofing notes that drip edge at rakes directs water off the deck and helps resist wind uplift, while metal roof rake trim seals the panel edge and creates a finished appearance.
Pro Tip: Ask your contractor to show you the actual flashing profile before installation. An L-shape is adequate for most applications, but a T- or D-shape provides noticeably better coverage at the rake board face, which matters in high-rain areas like Cherokee County.
What does a correct rake-edge installation look like?
Knowing the right sequence helps you ask better questions during an estimate and spot shortcuts before they become problems.
What to expect from a properly installed rake edge:
- Eave drip edge first: Drip edge is installed at the eaves before the underlayment is laid, so water runs over the metal and off the fascia.
- Underlayment over the deck: Felt or synthetic underlayment is rolled out across the deck, lapping over the rake edge metal on the gable ends.
- Rake drip edge over the underlayment: At the rakes, the drip-edge metal goes on top of the underlayment. This is the reverse of the eave sequence and is critical for correct water management.
- Fastener placement: Per ARMA's installation guidance, fasten drip edge with roofing nails at 8–10 inches on center. Do not drive nails into the vertical flange of the drip edge; nailing the vertical leg can crack the metal and create a water entry point.
- Starter course and shingles: Starter shingles are installed over the drip edge at the eaves and over the underlayment at the rakes before the field shingles begin.
- Shingle termination: Shingles at the rake should either be trimmed flush with the flashing or extend slightly over it per the manufacturer's specification, never left ragged or unsupported.
Correct underlayment sequencing at eaves and rakes is one of the most commonly skipped steps in budget installations. Getting it wrong does not just risk a leak; it can void the shingle manufacturer's warranty and leave you without coverage when you need it most.
Pro Tip: Before signing a contract, ask your roofer: "Do you install drip edge under the underlayment at eaves and over the underlayment at rakes, per manufacturer instructions?" A contractor who answers confidently and correctly is following the standard. One who hesitates or says it doesn't matter is worth a second opinion.
How to inspect your rake edge and spot common problems
You do not need to climb on the roof to check the rake edge. A pair of binoculars and a safe walk around the perimeter of your home will reveal most early warning signs.
What to look for from the ground:
- Lifted or curling shingles at the gable ends
- Rust stains or visible corrosion on the metal flashing
- Gaps between the flashing and the shingle edge
- Rotted, soft, or discolored rake board material
- Missing sections of flashing after a storm
- Nails popping through the flashing face
- Staining or peeling paint on the gable-end siding below the rake
Common problems at the rake include missing or improperly integrated flashing, wind uplift at the corners, and rot in the rake board or adjacent soffit. A Plus Exterior's guide notes that documenting these issues quickly after storms helps with insurance claims, which is especially relevant after the severe weather events common in the Atlanta area.
For context on what deck exposure from a failed rake edge can look like, the roof decking guide from The Original Roof Repair Company covers the signs of deck damage homeowners should recognize.
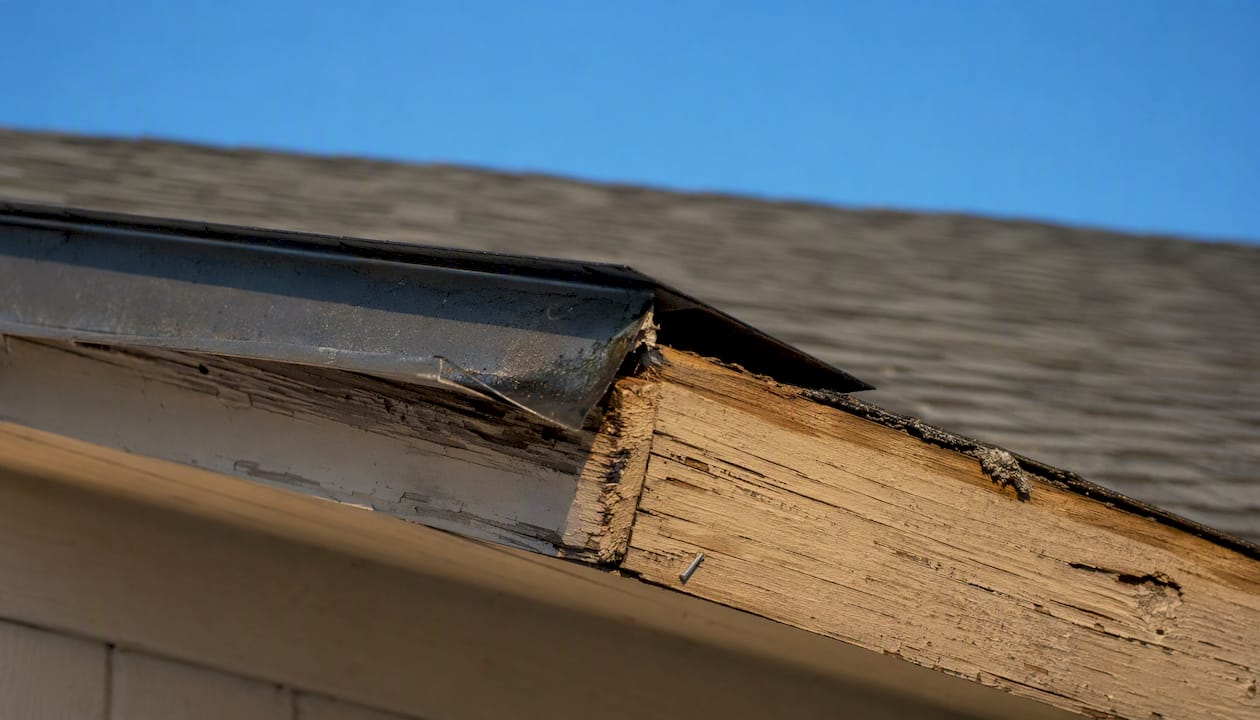
Small issues like a single lifted piece of flashing can sometimes be re-secured with roofing sealant as a temporary measure, but any rot in the rake board, widespread flashing failure, or recurring shingle lift at the gable end requires a professional repair. Do not attempt to walk the roof slope yourself.
Pro Tip: After any storm with winds above 50 mph, photograph your rake edges from the ground using your phone's zoom. Timestamped photos taken within 24–48 hours of a storm are significantly more useful for insurance documentation than photos taken weeks later.
For Atlanta homeowners, these roof lifespan tips include seasonal inspection advice suited to Georgia's storm patterns.
What does rake-edge repair or replacement typically cost?
Cost depends on the scope of work, the material selected, roof height, and the extent of any underlying damage. The figures below reflect general ranges for the Atlanta and Georgia market; your actual estimate may vary based on local code requirements, roof complexity, and insurance status.
Factors that move the price:
- Roof pitch and height (steeper or taller roofs require more labor and safety equipment)
- Extent of rot in the rake board or adjacent framing
- Material upgrade (copper vs. aluminum, composite vs. wood)
- Whether the job requires permit pulls under local code
- Insurance coverage for storm-related damage
Repairs that involve only flashing re-fastening or minor sealant work are typically completed in a few hours. A full rake board replacement with new flashing on a larger home can take one to two days, particularly if the underlying deck needs attention. Always confirm whether your contractor's estimate includes disposal of old materials and any required permits.
When should you call a roofer about the rake edge?
Some rake-edge conditions are worth monitoring. Others require a service call now.
Call a roofer when you see:
- Visible rot in the rake board — soft, discolored, or crumbling wood at the gable end means water has been getting in for a while.
- Repeated shingle lifting at the rake — if shingles keep peeling back at the gable end after storms, the flashing or fastening is not doing its job.
- Widespread or recurring flashing failures — a single loose piece may be a minor fix, but multiple gaps or sections pulling away from the deck suggest a systemic installation problem.
- Storm damage with potential insurance coverage — hail, high winds, and falling debris can damage rake flashing in ways that qualify for a claim. Document the damage quickly and contact a roofer who can support the insurance process.
- Missing flashing discovered during a routine inspection — some homes, particularly older ones in the Atlanta area, were built without proper rake flashing. Adding it is a straightforward upgrade that pays for itself in avoided repairs.
For urgent situations where the rake is actively exposed after a storm, emergency roof repair can stabilize the area before a full repair is scheduled.
Questions to ask your contractor during a free inspection:
- Are you installing drip edge under the underlayment at eaves and over the underlayment at rakes?
- What fastener spacing do you use, and do you avoid nailing the vertical flange?
- Does your installation follow the shingle manufacturer's installation manual?
- Will you document the damage with photos for my insurance file?
- Is this a repair or a replacement situation, and what is the cost threshold where replacement makes more sense?
For context on storm repair prioritization, RidgeCap GC's storm repair priority guide offers a useful framework for ranking repairs after severe weather.
Pro Tip: The Original Roof Repair Company offers free roof inspections and will document storm damage for insurance purposes at no additional charge. If you are in Cherokee County or the surrounding Atlanta metro area, scheduling an inspection before filing a claim gives you better documentation and a clearer picture of repair vs. replacement costs.
A roofer's perspective on rake edges in Georgia
Rake-edge problems are among the most common issues seen on Atlanta-area homes, and they are also among the most underestimated. A lifted shingle at the gable end looks minor from the ground. By the time a homeowner notices water staining on the interior wall below, the rake board and sometimes the wall framing behind it have been absorbing moisture for months.
The repair-first approach matters here. In most cases, catching a rake-edge problem early means a flashing repair or a rake board replacement, not a full roof replacement. The Original Roof Repair Company offers free inspections specifically because the difference between a $400 repair and a $4,000 replacement often comes down to how quickly the problem is identified. For homeowners in Canton, Cherokee County, and across the Atlanta metro, documenting storm damage within 24–48 hours of a weather event is the single most effective step you can take to protect both your roof and your insurance claim.
Get a free rake-edge inspection from The Original Roof Repair Company
Rake-edge damage in the Atlanta area tends to show up fast after storm season, and the cost difference between catching it early and waiting is significant. The Original Roof Repair Company provides free roof inspections and written estimates for homeowners across Cherokee County, Canton, and 11 surrounding Georgia counties within a 35-mile radius of Canton.

A free inspection includes a visual assessment of your rake edges, drip-edge flashing, underlayment integration, and shingle termination at the gable ends. If storm damage is present, the team documents it with photographs and can work directly with your insurance carrier and adjuster on your behalf. For active leaks or exposed areas after a storm, emergency roof repair is available to stabilize the roof before a full repair is scheduled. To book an inspection or get a repair estimate, visit The Original Roof Repair Company's roof repair page.
Sources
These are the primary references used in this article. Each is worth bookmarking if you want to verify installation details or look up local code requirements.
- Designing the Right Roof Rake
- Drip Edge vs Rake Edge: CT Code & Best Practices Guide
- Drip Edge & Rake Edge Installation: Why It Matters | A Plus Exterior
FAQ
Is a rake edge necessary?
Yes. Rake-edge flashing is strongly recommended and often required by shingle manufacturer guidelines and local building codes. Without it, wind-driven rain, shingle lift, and rot at the gable end are significantly more likely.
What does a rake edge look like?
The rake edge is the sloped line running from the ridge to the eave corner at each gable end of the roof. It typically shows as a metal strip along the shingle termination at the gable, sometimes with a visible trim board (rake board) beneath it.
Is a rake edge different from a drip edge?
Yes. "Rake edge" refers to the location, the sloped gable end of the roof. "Drip edge" refers to the metal flashing product. Drip-edge metal is commonly installed at the rake location, but the terms describe different things.
Why is it called a rake edge?
The term "rake" in roofing refers to the sloped edge along the gable end of a roof, derived from the architectural use of "rake" to describe an angled or sloping line. The "rake edge" is simply the edge at that sloped gable location.