
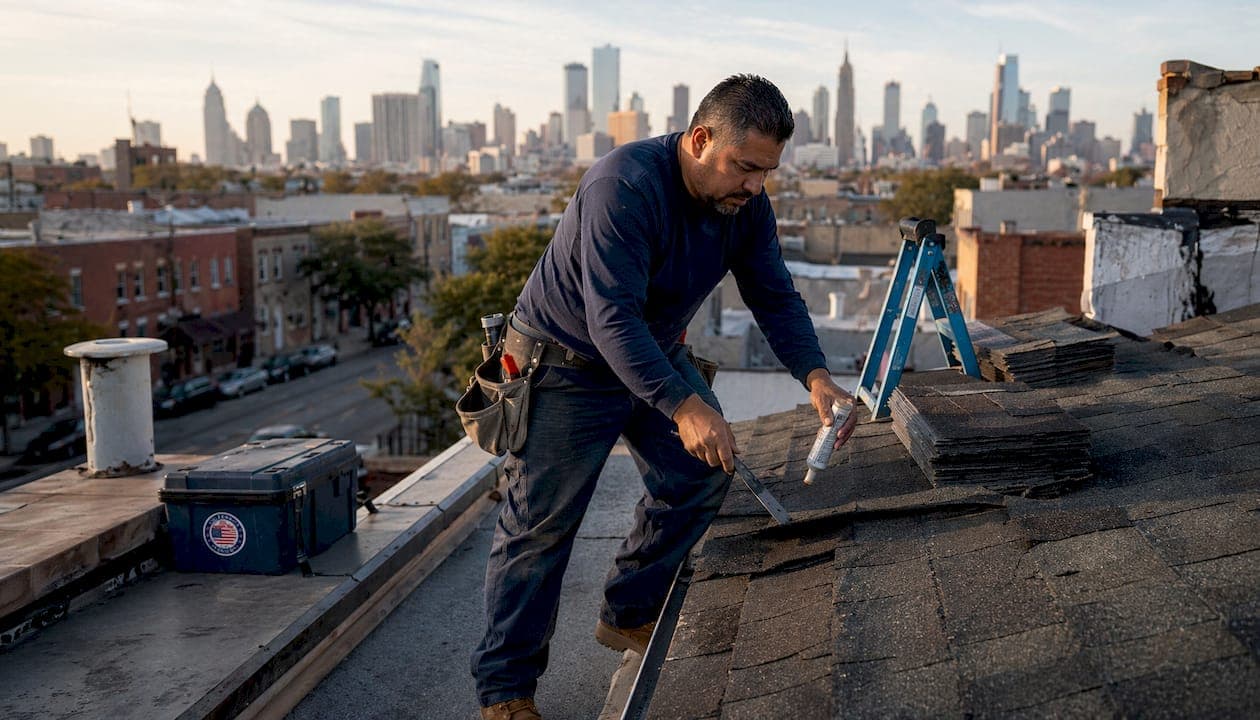
Repairing curled shingles on a roof means lifting the distorted edges, applying roofing cement beneath them, and securing or replacing the affected shingles to restore a watertight seal. Two distinct forms of curling exist: cupping, where shingle edges lift upward, and clawing, where the center buckles while edges stay flat. The correct repair depends entirely on which type you have. Cupping may be fixable with ventilation improvements and spot sealing, while clawing signals end-of-life shingle failure that no amount of cement will reverse. For Atlanta homeowners, Georgia's heat and humidity accelerate both conditions, making early diagnosis critical.
How to repair curled shingles: identifying the type and extent
The first step in any curled shingles repair is knowing exactly what you are dealing with. Cupping and clawing look similar from the ground but have completely different causes and repair outcomes.
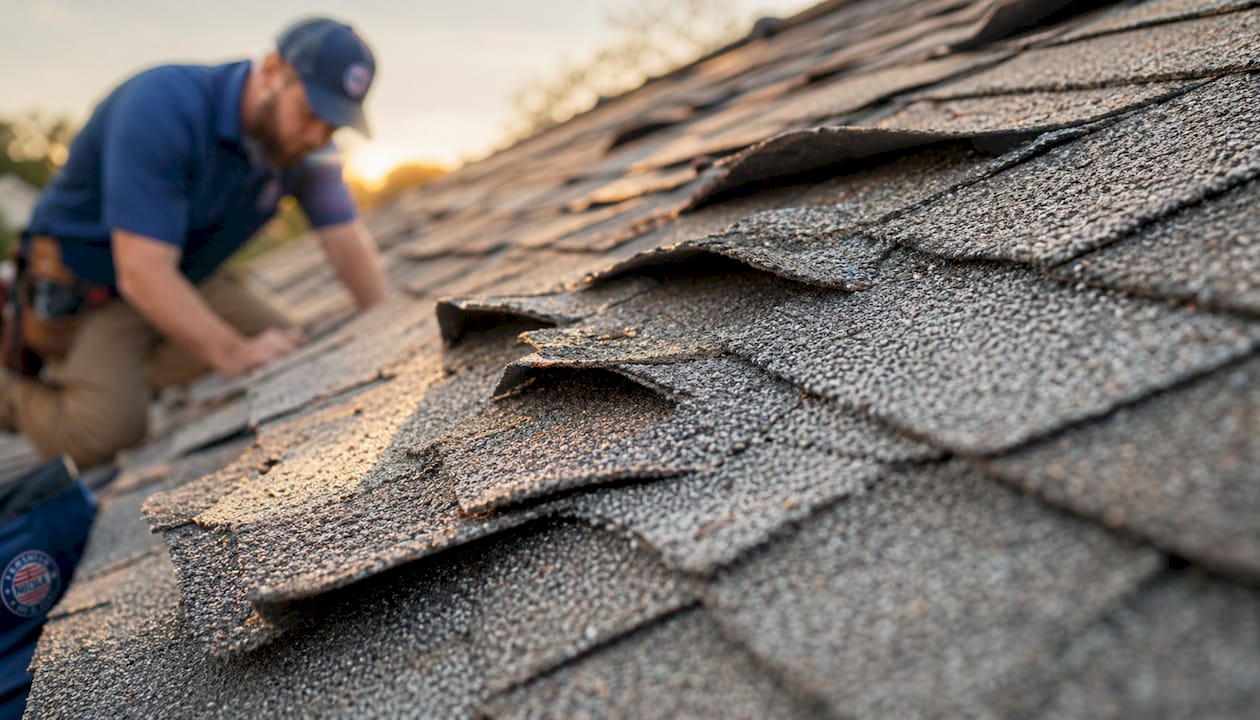
Cupping occurs when shingle edges curl upward, usually because moisture levels differ between the top and bottom layers of the shingle. Poor attic ventilation is the most common driver. Clawing occurs when the shingle center buckles upward while the edges remain flat. Attempting to flatten clawed shingles is futile and risks cracking the brittle material. Replacing clawed shingles is the only correct approach.
Use binoculars from the ground to assess your roof safely before climbing anything. Look for these signs:
- Edges that lift away from the roof deck (cupping)
- Centers that bubble or bow upward while edges stay down (clawing)
- Shingles that appear wavy or rippled across multiple rows
- Granule loss concentrated near curled areas, which signals accelerated aging
- Dark staining or moss growth near curled zones, which points to moisture retention
Pro Tip: Check your attic on a hot afternoon. If the temperature exceeds 150°F, your ventilation is failing. Attic temperatures above 150°F directly accelerate shingle curling and asphalt degradation, a problem especially common in Atlanta's summer heat.
The age of your roof matters as much as the type of curling. Curling on roofs under 12 years old almost always points to a ventilation problem. Curling on roofs older than 12–15 years typically reflects normal material aging. That distinction changes your repair strategy entirely.
What tools and materials you need before starting
Gathering the right materials before climbing onto your roof prevents mid-job mistakes and keeps the work safe. A disorganized repair attempt on a pitched roof is where most DIY injuries happen.
Tools required:
- Pry bar or flat bar for lifting shingle tabs without tearing
- Roofing hammer or nail gun loaded with galvanized roofing nails
- Caulk gun for applying roofing cement
- Utility knife for trimming replacement shingles to size
- Safety harness, non-slip boots, and a stable extension ladder
- Chalk line for keeping replacement rows straight
Materials required:
- Roofing cement (also called asphalt plastic cement)
- Matching replacement shingles (bring a sample to the supplier for color matching)
- Galvanized roofing nails, 1.75 inches minimum
- Roofing caulk for sealing nail heads
Weather conditions determine whether your repair holds or fails. The ideal repair temperature is 60°F–80°F on a dry day. Cold weather makes shingles brittle and prone to cracking under pressure. Hot days above 90°F make sealants gooey and can cause fresh cement to slide before it sets.
The International Residential Code section IRC R806.2 sets minimum attic ventilation ratios for residential roofs. Georgia follows this standard. If your attic ventilation does not meet code, any shingle repair you complete today will likely curl again within a few seasons. Fixing the ventilation is not optional if cupping is the problem.
| Condition | Effect on repair | Recommended action |
|---|---|---|
| Temperature below 50°F | Shingles crack under pressure | Postpone repair |
| Temperature 60°F–80°F | Optimal flexibility and adhesion | Proceed with repair |
| Temperature above 90°F | Sealant slides before setting | Repair early morning only |
| Wet or damp surface | Cement will not bond | Wait for full dry conditions |
| High humidity with no rain | Acceptable with caution | Inspect surface moisture first |
Step-by-step guide to fixing curled shingles
This process applies to cupped shingles that are still flexible and structurally intact. If a shingle cracks when you apply light pressure, replace it rather than seal it.
-
Inspect the shingle by hand. Press gently on the curled edge. If it flexes without cracking, it is a candidate for sealing. If it snaps or feels rigid and brittle, plan to replace it.
-
Lift the curled edge carefully. Slide a pry bar or gloved hand under the edge. Work slowly from the outer tip toward the center. Never force a cold shingle. If the temperature is below 60°F, warm the shingle briefly with a heat gun on its lowest setting before lifting.
-
Clean the underside. Remove any dirt, debris, or old dried cement from beneath the lifted tab. Cement will not bond to a dirty surface.
-
Apply roofing cement under the tab. Use a caulk gun to apply a generous bead of roofing cement across the underside of the lifted area. Spread it evenly with a putty knife. Cover the full width of the curled section, not just the tip.
-
Press the shingle flat and hold it. Press the tab firmly down onto the roof deck. Place a brick or heavy stone on top and leave it for at least 24 hours. This step is skipped by most DIYers and is the main reason repairs fail within a season.
-
Seal all nail heads. Apply a small dab of roofing cement over every exposed nail head in the repaired area. Exposed nail heads are a primary water entry point.
Pro Tip: Never reuse old nail holes when replacing a shingle. Drive new nails at least one inch away from the original holes. Old holes allow water to wick directly into the roof deck even when the shingle looks flat.
Replacing a shingle that cannot be saved
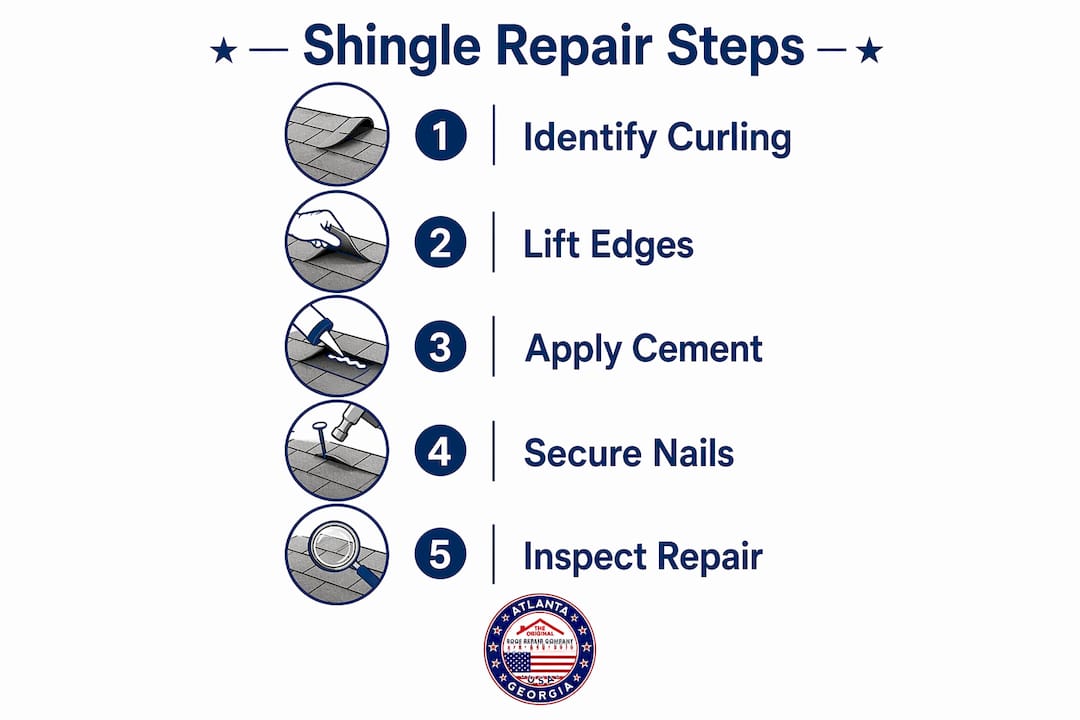
When a shingle is too brittle or damaged to seal, full replacement is the right call. Slide the pry bar under the damaged shingle and lift it enough to expose the nails. Remove each nail with the pry bar claw. Slide the old shingle out. Slide the new shingle into position, aligning it with the row on each side. Drive four galvanized nails through the nailing strip, one inch from each edge and evenly spaced across the width. Apply roofing cement under the tabs of the shingles above to reseal the overlapping edges. Dab cement over each new nail head.
Matching shingles for a clean finish
Shingle color fades over time. A brand-new shingle installed next to a 10-year-old one will stand out visibly. Bring a removed shingle to a roofing supply house and ask for the closest weathered match. Some suppliers stock discontinued colors in small quantities. The Original Roof Repair Company carries experience matching shingles across Cherokee County and the broader Atlanta metro area, which matters when aesthetics are part of the repair goal.
When repairs are not enough: troubleshooting and professional help
Not every curled shingle situation is a DIY fix. Knowing when to stop and call a professional saves money and prevents structural damage.
The clearest signal for replacement over repair is scale. If more than 10–15% of your roof surface shows curling, a full roof replacement is the recommended course of action regardless of the roof's age. Spot repairs on a roof that far gone will not hold, and the cumulative repair cost will exceed replacement value quickly.
Watch for these warning signs that the problem goes deeper than the shingles:
- Soft or spongy spots on the roof deck when you walk on it (indicates deck rot)
- Water stains on attic rafters or sheathing directly beneath curled areas
- Mold or mildew smell in the attic
- Multiple shingles curling in the same section after a recent repair
- Shingles that crack immediately when you try to lift them
Delaying repair of curled shingles risks deck rot and expanded leaks, increasing total repair costs significantly. A small curled section that costs a few hundred dollars to fix today can become a deck replacement job costing several thousand dollars within one or two rainy seasons.
Cost reality check: Minor spot repairs for curled shingles run $200–$1,200 nationally in 2026. Full roof replacements average $5,860–$13,130. The gap between those numbers is the financial argument for acting early. A professional inspection that costs a few hundred dollars can tell you exactly where on that spectrum your roof sits.
Professional roofing inspections assess curling type, affected area percentage, and underlying causes that a homeowner cannot see from the surface. That assessment prevents the most expensive DIY mistake: repairing symptoms while the real problem, usually ventilation, continues unchecked beneath the surface. The Original Roof Repair Company follows a repair-first approach and recommends replacement only when repair costs exceed $4,000 and replacement is the smarter financial choice.
For steep roofs or roofs with complex damage patterns, the safety risk of DIY work outweighs the cost savings. A fall from a two-story roof is a life-altering event. Knowing when to call a roofing professional is as important as knowing how to make the repair itself.
Key takeaways
Repairing curled shingles requires identifying the curling type first, because cupping is often fixable while clawing signals shingle failure that only replacement can address.
| Point | Details |
|---|---|
| Identify the curling type | Cupping may be repairable; clawing means the shingle must be replaced, not sealed. |
| Check the 10–15% threshold | Replace the full roof if more than 10–15% of shingles show curling. |
| Repair in the right conditions | Work only in 60°F–80°F dry weather to get proper cement adhesion. |
| Never reuse old nail holes | Drive new nails at least one inch from original holes to prevent water infiltration. |
| Fix ventilation to prevent recurrence | Cupping caused by poor attic airflow will return unless the ventilation problem is corrected. |
What I've learned about curled shingles after years on Atlanta roofs
The most common mistake I see is homeowners treating curled shingles as a surface problem when they are almost always a system problem. You can seal a cupped shingle perfectly and have it curl again within 18 months if the attic is running at 160°F every summer. The shingle is not the failure. The ventilation is.
Clawing gets misread constantly. Homeowners see a buckled shingle and reach for a tube of roofing cement. That shingle is done. The asphalt has dried out and lost its flexibility. Pressing it flat and sealing it might hold through one winter, but the next heat cycle will pop it right back up, usually with a crack this time.
The age threshold matters more than most people realize. A roof that starts curling at year 8 is telling you something is wrong with the system. A roof that starts curling at year 18 is telling you it has had a good run. Those two situations call for completely different responses, and conflating them is how homeowners end up spending money on repairs that never stick.
My honest advice: if you are in the Atlanta metro area and your shingles are curling before the 12-year mark, get the attic inspected before touching a single shingle. The repair you think you need may not be the repair that actually solves the problem.
— Eric
Roof repair services from The Original Roof Repair Company
Curled shingles are one of the most common calls The Original Roof Repair Company receives from homeowners across Cherokee County and the Atlanta metro area.
The team diagnoses the curling type, measures the affected area, and gives you a straight answer on whether spot repair or full replacement makes more financial sense. Professional shingle repair covers everything from sealing isolated cupped tabs to full shingle replacement with matched materials. When ventilation is the root cause, that gets addressed as part of the solution, not ignored. If your damage qualifies for an insurance claim, the team also handles roof insurance claim advocacy directly with your carrier. Contact The Original Roof Repair Company for a no-pressure inspection and estimate.
FAQ
What is the difference between cupping and clawing in shingles?
Cupping means shingle edges lift upward and is often caused by poor attic ventilation. Clawing means the shingle center buckles while edges stay flat, which signals end-of-life shingle failure that requires replacement.
How do I know if my curled shingles need repair or full replacement?
If more than 10–15% of your roof surface shows curling, full replacement is the recommended option. Isolated curling on a roof under 12 years old usually points to a ventilation problem that repair alone will not fix.
What is the best weather for repairing curled shingles?
The ideal conditions are a dry day with temperatures between 60°F and 80°F. Cold weather makes shingles brittle and prone to cracking, while extreme heat prevents roofing cement from setting properly.
Can I repair curled shingles myself?
Yes, if the affected shingles are still flexible, the curling covers a small area, and you have proper safety equipment. Brittle shingles, widespread curling, or steep roof pitches are situations where professional repair is the safer and more cost-effective choice.
How much does it cost to fix curled shingles?
Minor spot repairs run $200–$1,200 in 2026. Full roof replacements average $5,860–$13,130 nationally. Acting early on isolated curling keeps costs at the lower end of that range.